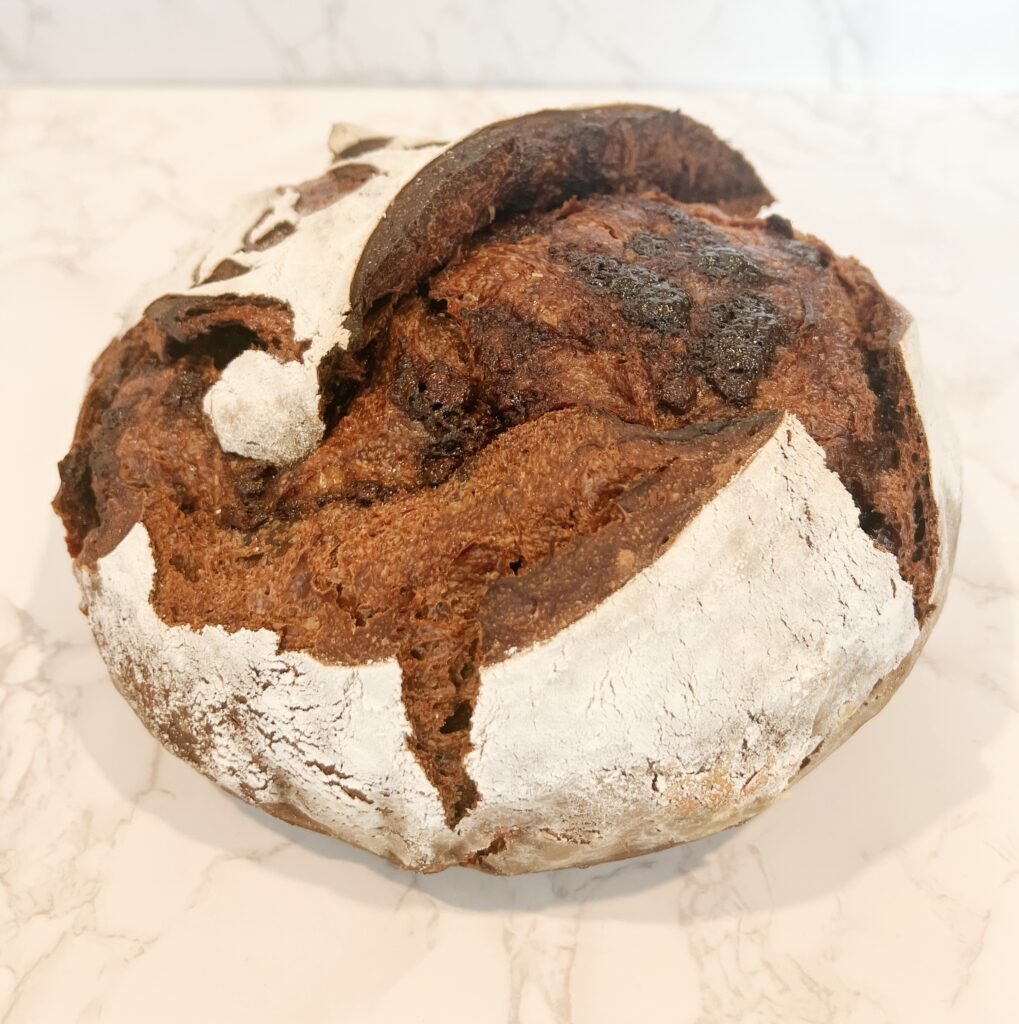
A Delicious Twist on a Classic Recipe
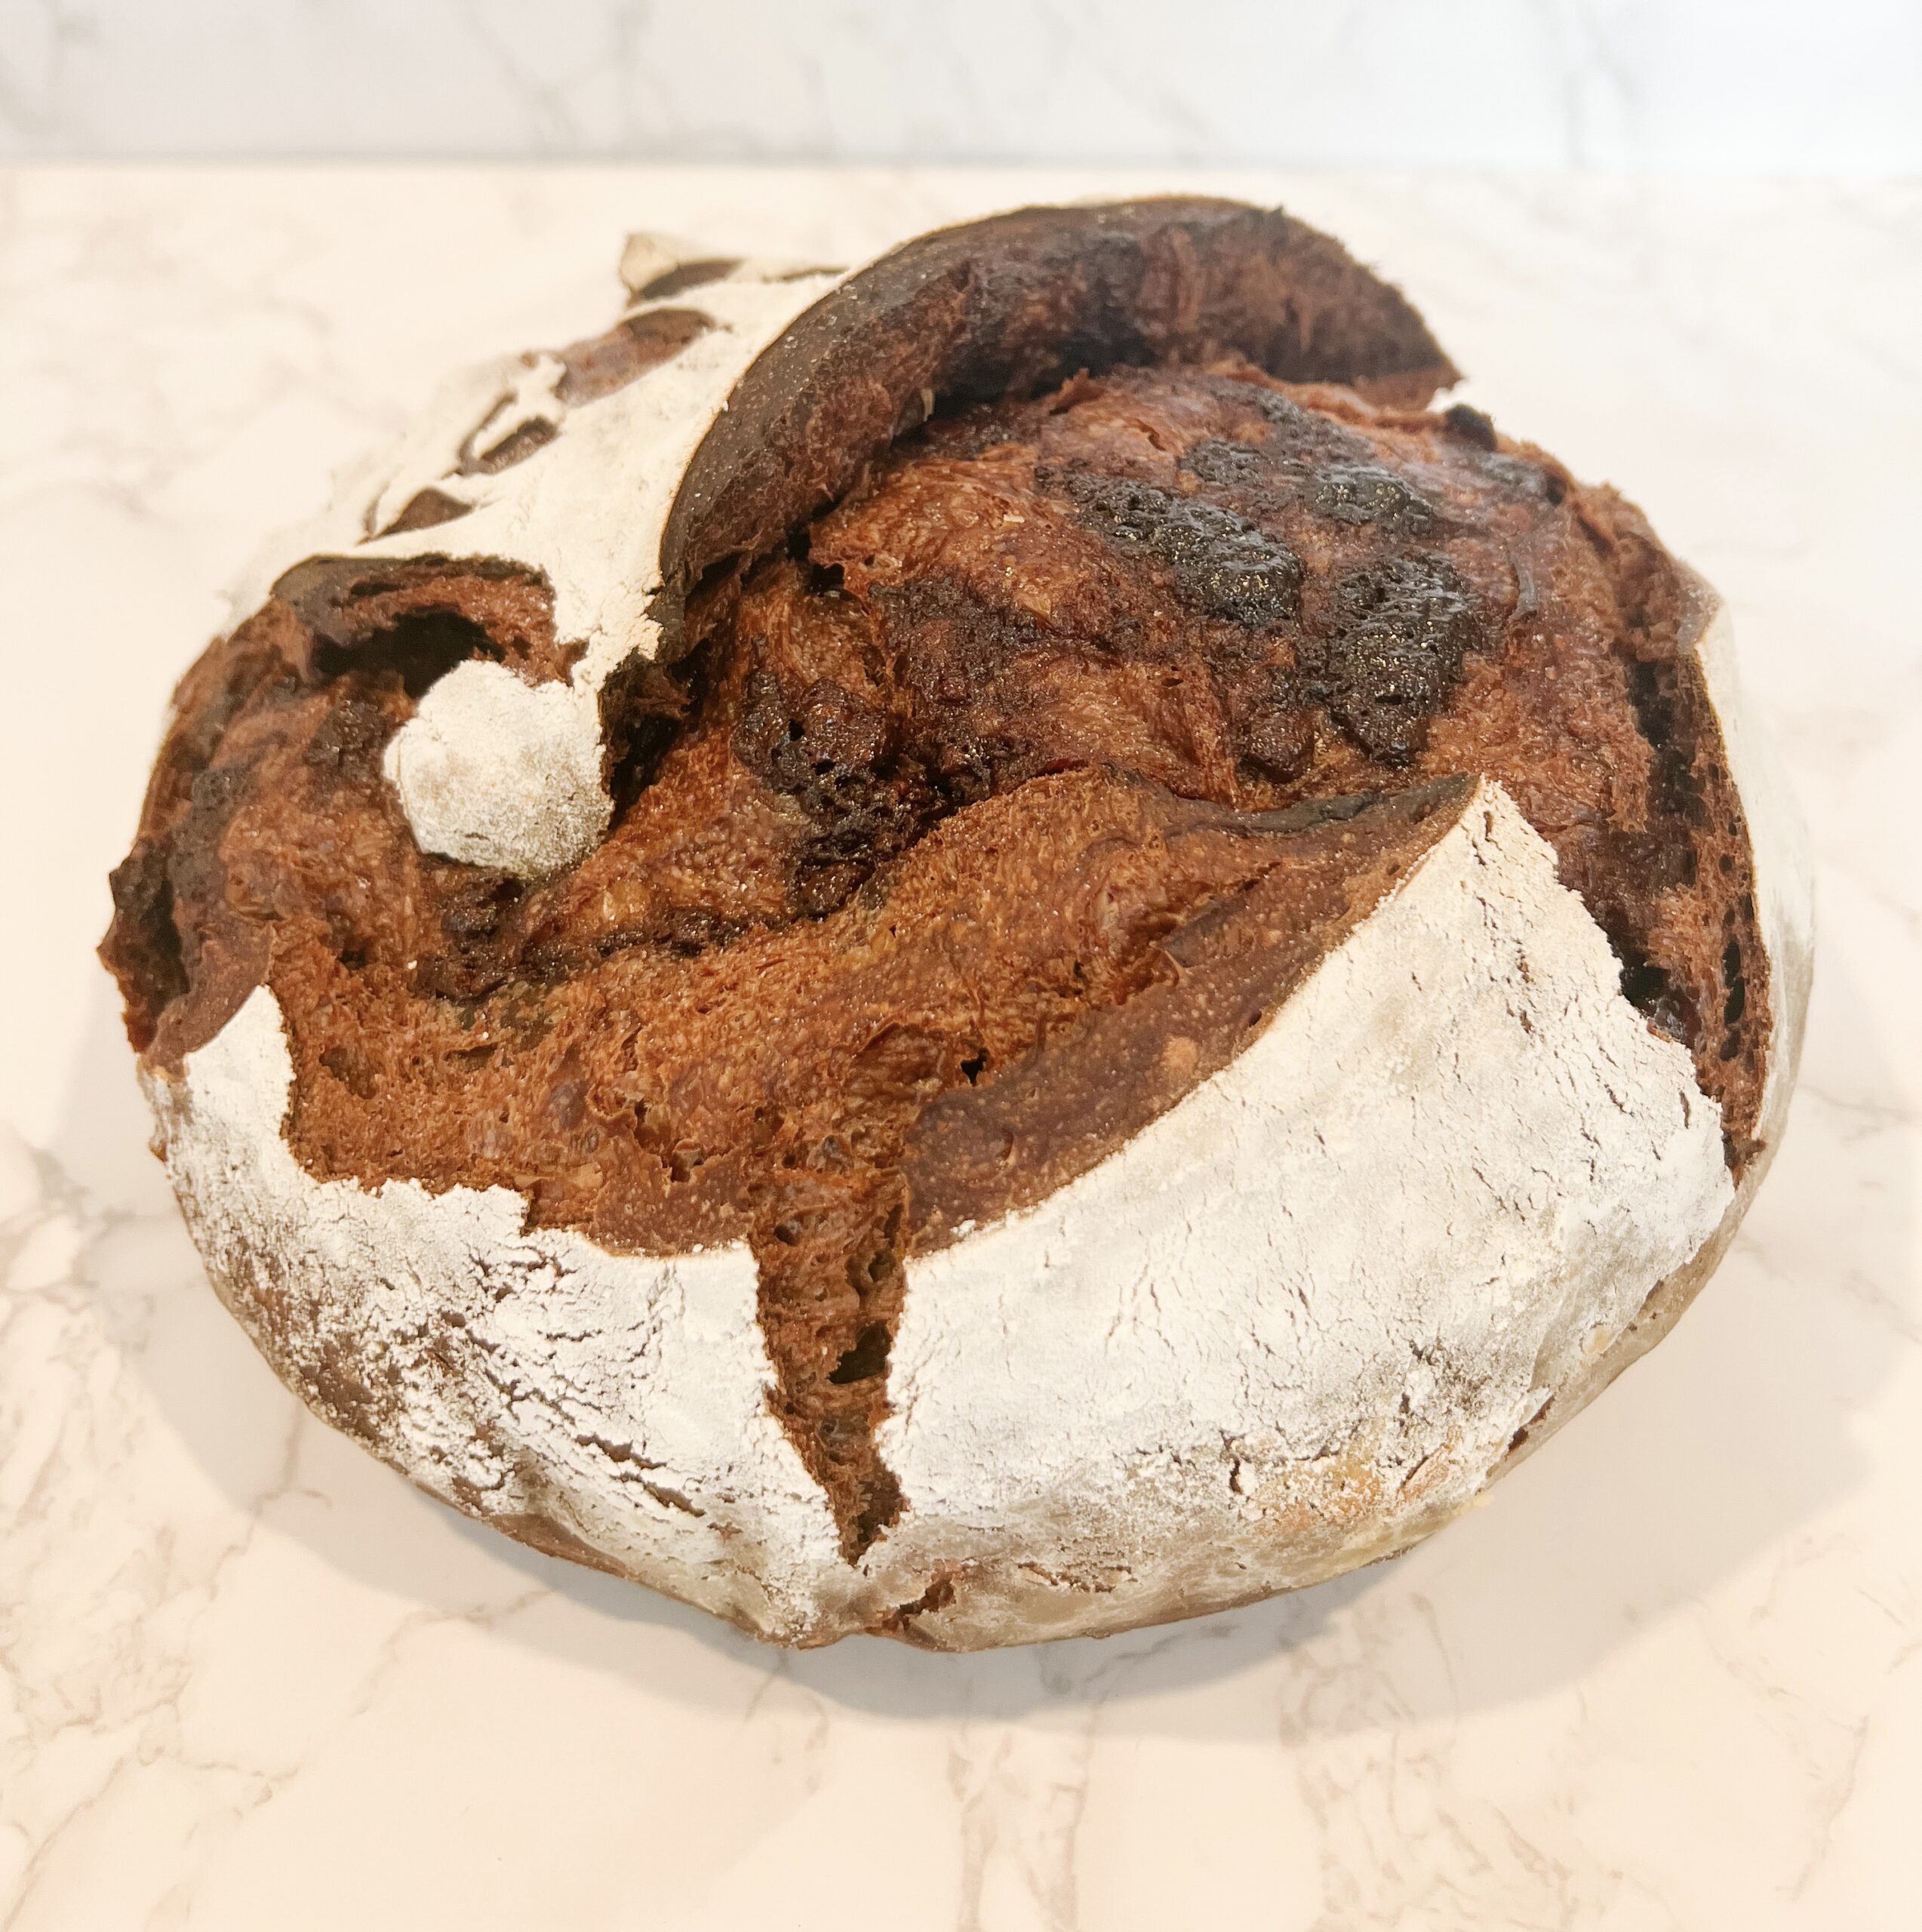
Sourdough bread has been a staple in many cultures for centuries, known for its unique tangy flavor and chewy texture. In recent years, the trend of making sourdough bread at home has gained popularity, with bakers experimenting with various flavors and additions to create new and exciting variations. One variation that has captured the hearts and taste buds of many is chocolate sourdough bread. This delightful combination of rich, dark chocolate and sourdough creates a unique treat that is perfect for any occasion. Is this dessert? Is it a snack? You decide!
Crafting the Perfect Chocolate Sourdough Bread
Creating chocolate sourdough bread requires a basic understanding of traditional sourdough bread-making techniques, along with the addition of high-quality cacao. The process typically involves mixing the cacao into the dough during the initial mixing or folding stages. This ensures that the chocolate is evenly distributed throughout the bread, resulting in a uniform chocolaty flavor in every bite.
Health Benefits of Chocolate Sourdough Bread
While indulgent, chocolate sourdough bread can offer some surprising health benefits. Dark chocolate, sourced from cacao, is known for its antioxidant properties and potential cardiovascular benefits when consumed in moderation. When paired with the prebiotic qualities of sourdough fermentation, chocolate sourdough bread can be viewed as a nourishing treat that satisfies both the palate and body.
Is all Cacao Created Equally?
Unfortunately, no. Chocolate (specifically dark chocolate because of it’s high cacao level) has been in the news for being high in heavy metals. Cacao is typically not naturally high in heavy metals, but becomes contaminated during processing. For example, when the cacao pods are drying in the sun, lead-filled dust and debris (from gas fumes or nearby heavy industry) lands on the beans, contaminating them.
I have my own incredible source for cacao that is:
- tested for heavy metals
- mycotoxin free (molds/fungus)
- sourced from heirloom cacao trees
- watered with pure water
- grown at a high elevation away from mining or any industry that may cross contaminate
- fermented in wood barrels instead of metal containers to prevent leeching
- ground using stone rather than any metal to also prevent metal contamination
- full of antioxidants
To check it out, click here for Laura Lives the Good Life Organic, Heirloom Cacao.
To Eat it on its Own or Pair it With Something Equally Delicious?
Chocolate sourdough bread can be enjoyed in various ways. Whether toasted and spread with creamy peanut butter, paired with fresh berries, or simply savored on its own, this delectable bread offers versatility in both sweet and savory applications. Pair it with a glass of raw milk, for the best snack or dessert!
Chocolate sourdough bread represents a delightful marriage between two beloved culinary elements – rich, velvety chocolate and tangy sourdough. Its growing popularity is a testament to the adventurous spirit of bakers worldwide who seek to infuse tradition with innovation, resulting in delightful creations that captivate our senses.
Ingredients Used for this Bread
Here are some of my favorite, high-quality ingredients:
- Laura Lives the Good Life sourdough starter
- Laura Lives the Good Life organic, heirloom cacao
- Redmond Real Sea Salt– use code LAURA15 for a discount
- Central Milling Flour
- These chocolate chips or Evolved brand are best option choices, but use whatever you have on hand
Watch me make Chocolate Sourdough
Bread here!
Chocolate Sourdough Bread
Ingredients
- 415 grams water
- 50 grams Laura Lives The Good Life cacao
- 115 grams active sourdough starter
- 10 grams Redmond sea salt
- 75 grams organic white sugar or coconut sugar
- 550 grams organic all purpose flour
- 100 grams chocolate chips
Instructions
Make the dough
- In a pan over medium low heat, warm the water (do not get the water hot or it may harm the yeast. Baby bottle warm is best). Add the Laura Lives the Good Life cacao powder and whisk until combined.
- Add the water and cacao mixture, starter, salt and sugar to a large mixing bowl. Mix everything to combine. Add the flour and combine well, using a dough hook or your hands. Cover the mixture and let it sit somewhere warm, covered, for 30 minutes (this can sit for up to 2 hours).
Work the dough
- After the 30 minutes, stretch the dough and rotate the bowl several times (stretch and fold technique). Cover and let sit for 30 minutes. Complete 3 sets total of stretch and folds, with 30 minutes in between each set. Let the dough rest somewhere warm for another 2-4 hours.
Shape the dough
- Before turning the dough out of the bowl, perform a set of coil folds (with wet fingertips) to strengthen the dough. Turn the dough out onto a lightly floured counter (or, if you are experienced in dough handling, no extra flour is needed). Do an initial pre-shape, forming the dough into a loose round loaf shape. Sprinkle lightly with flour, cover and let rest for 10 minutes.
Lamination and Final Shaping
- Stretch the dough into a rectangle. Sprinkle 2/3 of the chocolate chips all over the dough. Lightly press them into the dough. Fold each side so they meet in the center. Add the rest of the chocolate chips. Roll the dough up and create a ball. Pull the ball of dough, while tucking in the bottom and scoot the dough towards yourself several times. This should create surface tension on the dough so it holds its shape. The dough should be round, taut and smooth.
- Place the dough into a floured banneton. Let sit somewhere warm for 1 hour. Cover well and place in refrigerator. Refrigerate for 12 hours and up to 3 days.
Score and Bake the Dough
- Preheat the oven to 500°. Turn the dough onto parchment paper. Using a sharp blade, score the loaf with at least one long cut being 1/2 inch deep, at a 30° angle, or score a cross shape (looks like a plus sign) in the center.
- Place a baking sheet in the oven, the dough in the Dutch oven, and the Dutch oven on the baking sheet to bake (see note). Bake for 25 minutes with the lid on. Turn the temperature down to 425° and bake for 10 minutes with the lid on. Remove the lid and bake for an additional 10-15 minutes. Remove and let cool (at least slightly!) before enjoying.



Hi! May I please clarify the baking time? Is it 25 minutes at 500? Then turn the heat down to 425: 10 minutes with the lid on and 10-15 mins with the lid off?
Thanks! Celeste
Author
Yes, that’s right!
Looks delish! Is cacao necessary, or can you evenly substitute cocoa powder?
Author
Yes, you can do a 1:1 substitution.
Just took my loaf out of the oven and was so excited to cut into it and enjoy – the center was not cooked! I ended up cooking it an additional 10 minutes at 425 but the topped burned. Covered, lowered the temp to 400 and cooked another 15 mins and am about to enjoy!
LOVE chocolate and so happy to have found your recipe for chocolate sourdough! Thank you for sharing.